
See the first raspberry pi lesson for connecting to the raspberry pi with SSH.
Connecting Arduino to the Raspberry pi
- We can make the connection with the comport object as we have done before on the desktop. It’s a good idea to upload your Arduino sketch on your desktop, and afterwards connect the Arduino to the Raspberry Pi.
- Or you can use Pduino
- Make sure that you have StandardFirmata uploaded to your Arduino, then connect it to one of the USB ports on the raspberry pi.
- The
arduinoobject in pure data runs on the raspberry pi as well. - You should be able to run all the things we have made during the course with pduino.
Running pd standalone
- I have prepared a simple pd example that can run standalone. Download the example by running
“wget https://dl.dropboxusercontent.com/u/14056702/PID/potsynth.zip”
in the terminal. (Thewget-command downloads files from URL’s.) - Expand the archive by running “
unzip potsynth.zip“. - You should now have a folder called
potsynthin your home folder. Check by running “ls” (list files command). wget https://dl.dropboxusercontent.com/u/14056702/PID/pd%2Barduino.zip- Run “
pd-extended” on the raspberry pi and browse forpotsynth/simplest.pd - On the left side you can see what we need to start the DSP and connect to arduino.
- The right side contains all necessary elements for a simple synth that we control from analog input 0 on arduino.
Running programs on boot
- We can add commands to a file with the name
/etc/rc.localto run them immediately when the system has booted up. When the system boots, it will look in this file and run the commands that are present there. - Run “
sudo nano /etc/rc.local” to open the file in a text editor. - Add this line:
/usr/bin/pd-extended -nogui /home/pi/potsynth/simplest.pd &
after the comment (lines starting with#) in the text file. This is the command that will run on boot. Explanation of the line:- We need the full paths for the commands and files (
/usr/bin/pd-extendedinstead ofpd-extended). -
-noguiis an argument for puredata that tells it to run on the command line only. - The
&-sign at the end of the line tells the command to run in the background.
- We need the full paths for the commands and files (
ctrl+X to close the text editor and answer Y to save the file. If it asks for the filename, press enter.sudo reboot“) your Raspberry pi, the code will run automatically, so you don’t need a keyboard or network connection for operation.Shutdown button
- As we were talking last time, it’s not a great idea to plug out the power of your raspberry pi without running the shutdown command.
- Here is a python script that shuts down your raspberry pi if GPIO pin 7 is connected to ground.
- You can download it on your raspberry pi by running:
“wget https://dl.dropboxusercontent.com/u/14056702/PID/shutdown.py“ - Add the python command to the
/etc/rc.localfile in the same way as we did with the pot-synth in last exercise. This is the line:
/usr/bin/python /home/pi/shutdown.py & - Now you need to connect your shutdown button here:
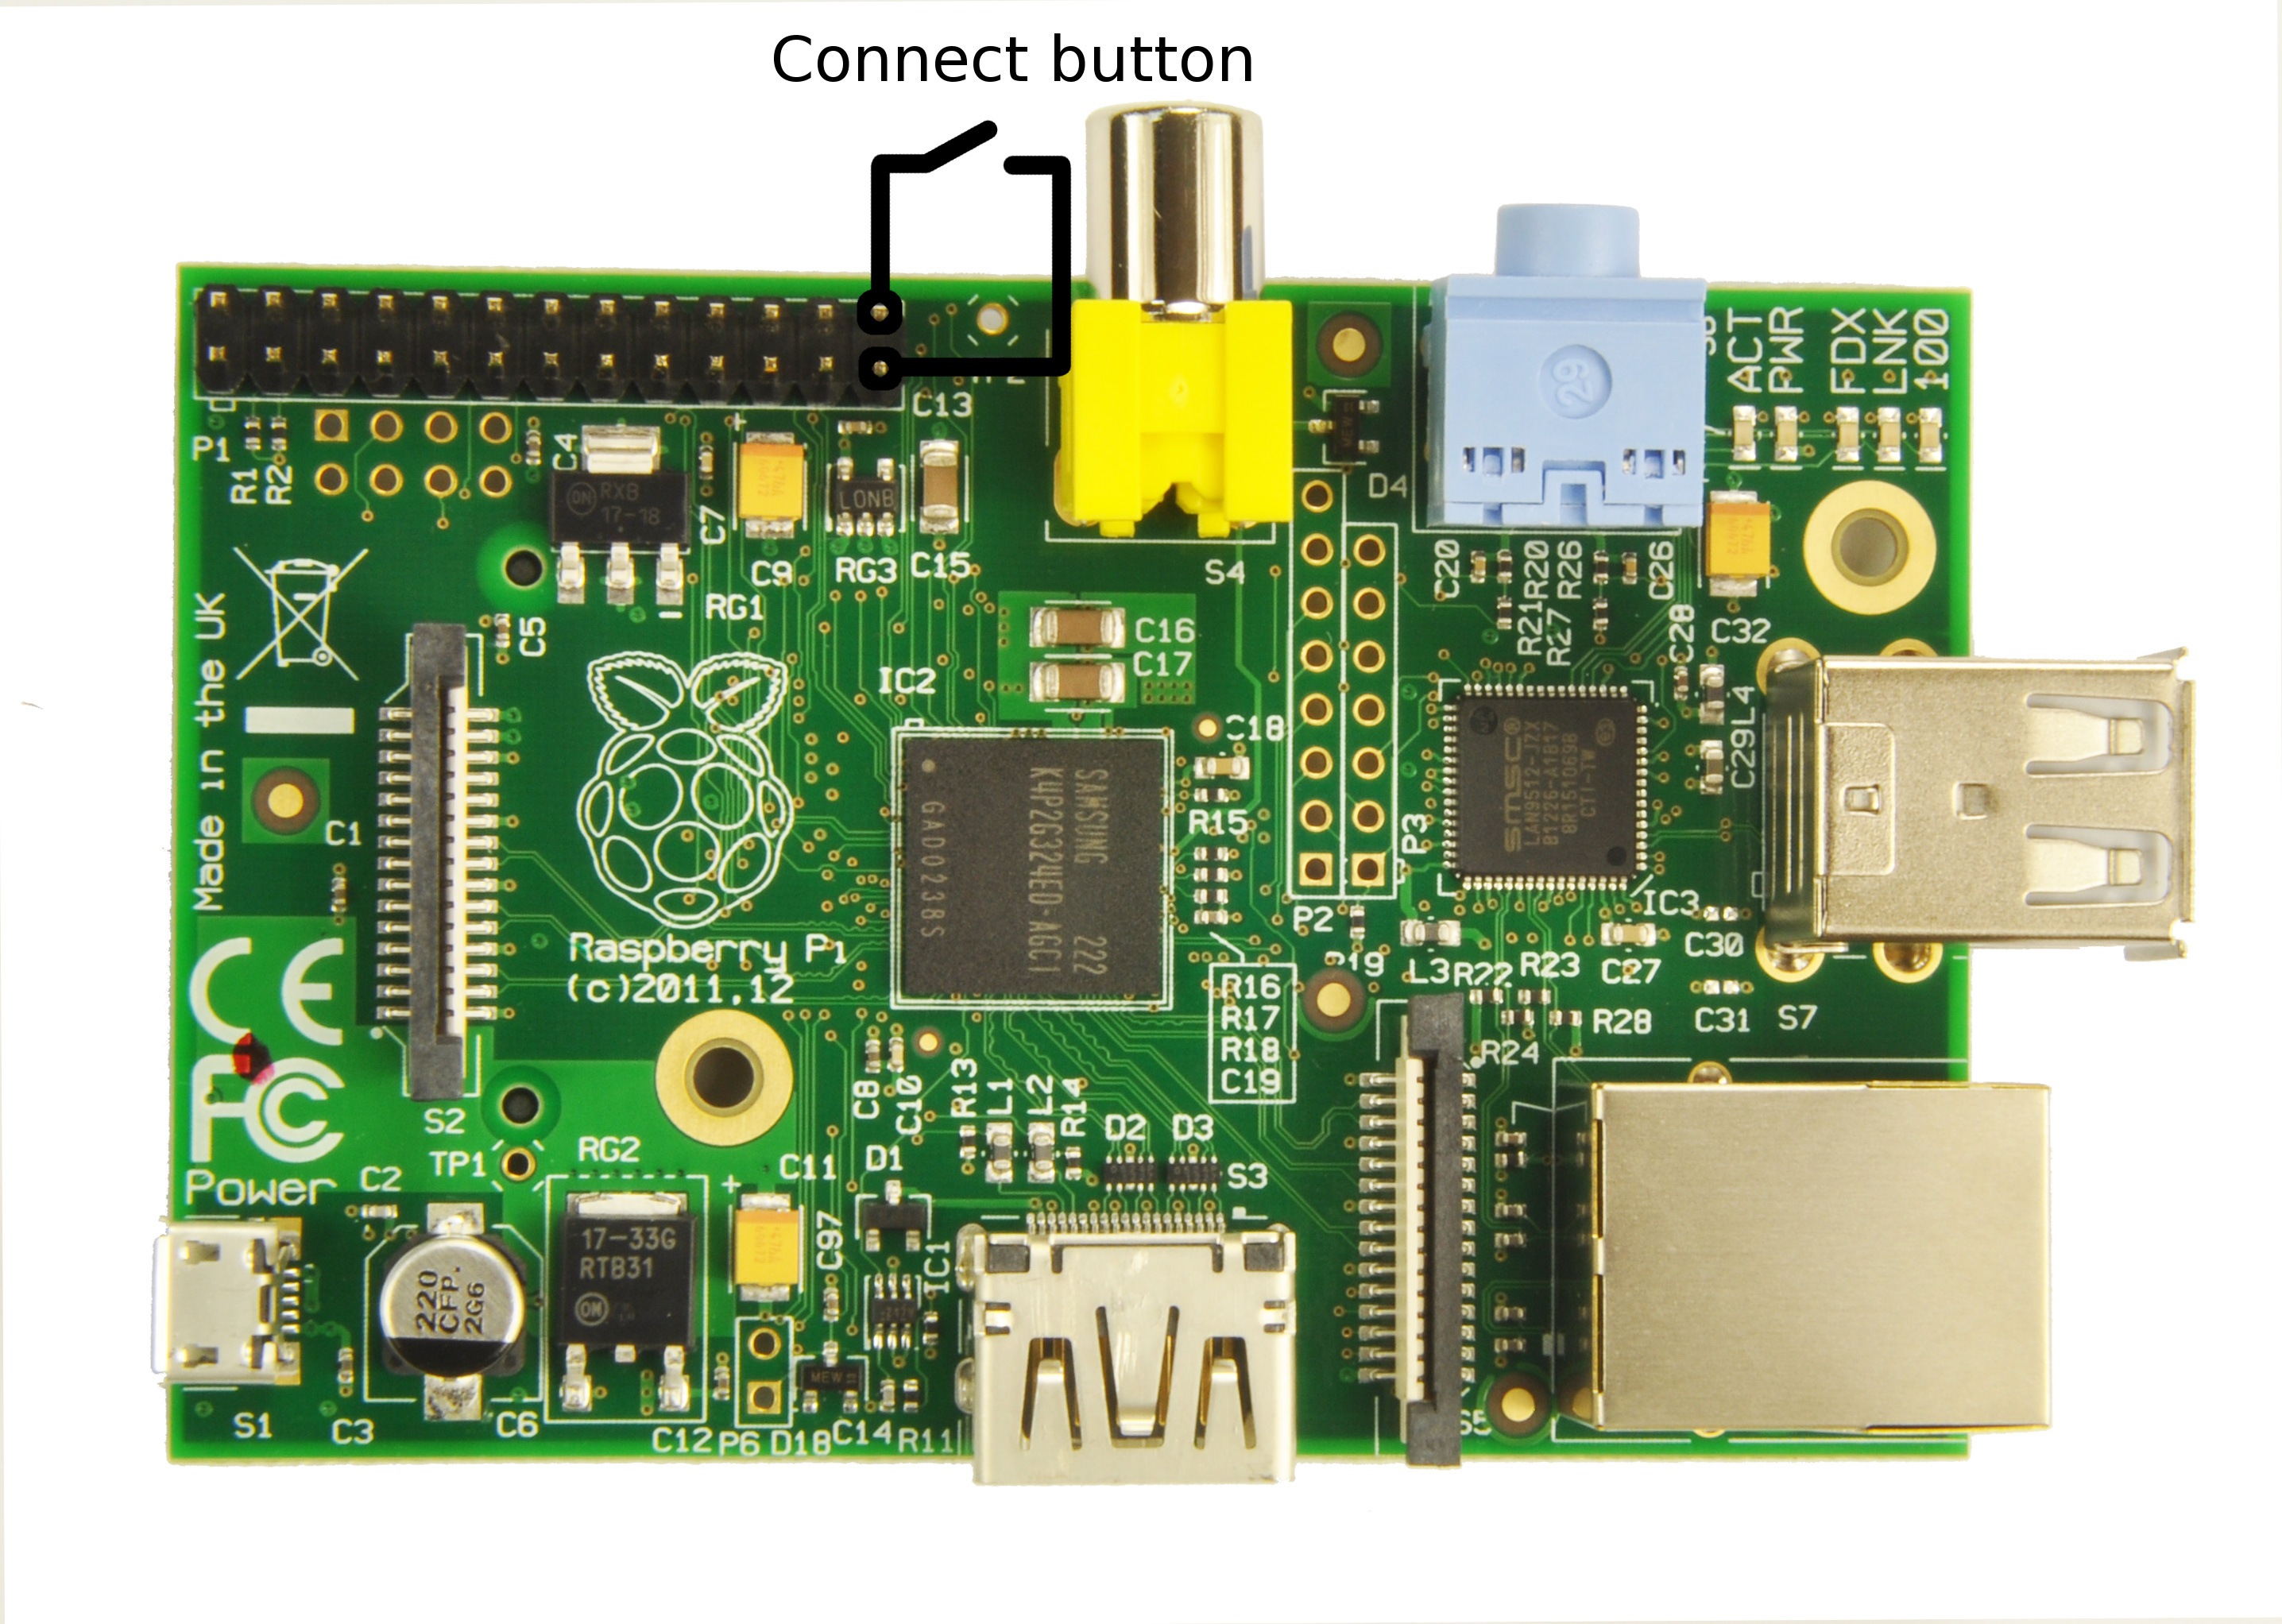
- Again, you need to reboot (“
sudo reboot“), for the changes to take effect. - Pressing this button after startup will now shutdown your raspberry pi in the proper way.
Notes:
Sudo command
- The
sudocommand runs other commands with admin rights. - If you try to run something and it doesn’t work, especially if there is some error about permissions, running it with
sudoin front often helps. - Be careful what you type, you can easily break your system with this command. (But don’t worry, we can reinstall.)
Package manager
- The package manager is a handy way to install software in linux
- “
apt-cache search _keyword_” to find software. (Replace “_keyword_” with what you want to find, e.g. “apt-cache search arduino“.) - “
sudo apt-get install _packagename_” to install the software by name. (Replace “_packagename_” with what you want to install.) - “
sudo apt-get update” to update package lists. - “
sudo apt-get upgrade” to upgrade all software to latest version.
USB hard/flash drive usage (FAT format)
- It’s a good idea to connect your USB device before starting up the raspberry pi!
- Easiest way to get USB drives to mount is running the desktop at boot. See command
raspi-config. They will mount under the folder/media/. -
Starting the desktop might slow you down if you don’t need it. Another possibility is manual mounting:
- Run command “
sudo ls /dev/sd*” to find your device, it should be either/dev/sda1or/dev/sda2. - Run “
sudo mkdir /mnt/usb” to create a mounting point for your device. - Run “
sudo mount -t vfat /dev/sda* /mnt/usb” (replace/dev/sda*with your device from next step). - Your hard drive should now be in the location
/mnt/usb.
- Run command “
Adding analog inputs with MCP3208 Analog-digital converter (ADC)
- If we want to loose the Arduino in our setup, we can communicate directly with an ADC from the Raspberry pi.
- To connect, you can follow Adafruit’s tutorial.
- To connect the analog readings to something else than python, we need for example OSC messaging. Ask the teacher if you are unsure about how to work with OSC.